/
/

Reading Mode
Clean editorial style with drop caps, pull quotes, and refined typography
Bambu Lab Print-and-Cut calibration failure with non-Bambu sticker paper and laminate? Here's the two-part fix that finally worked — after a LOT of wasted material.
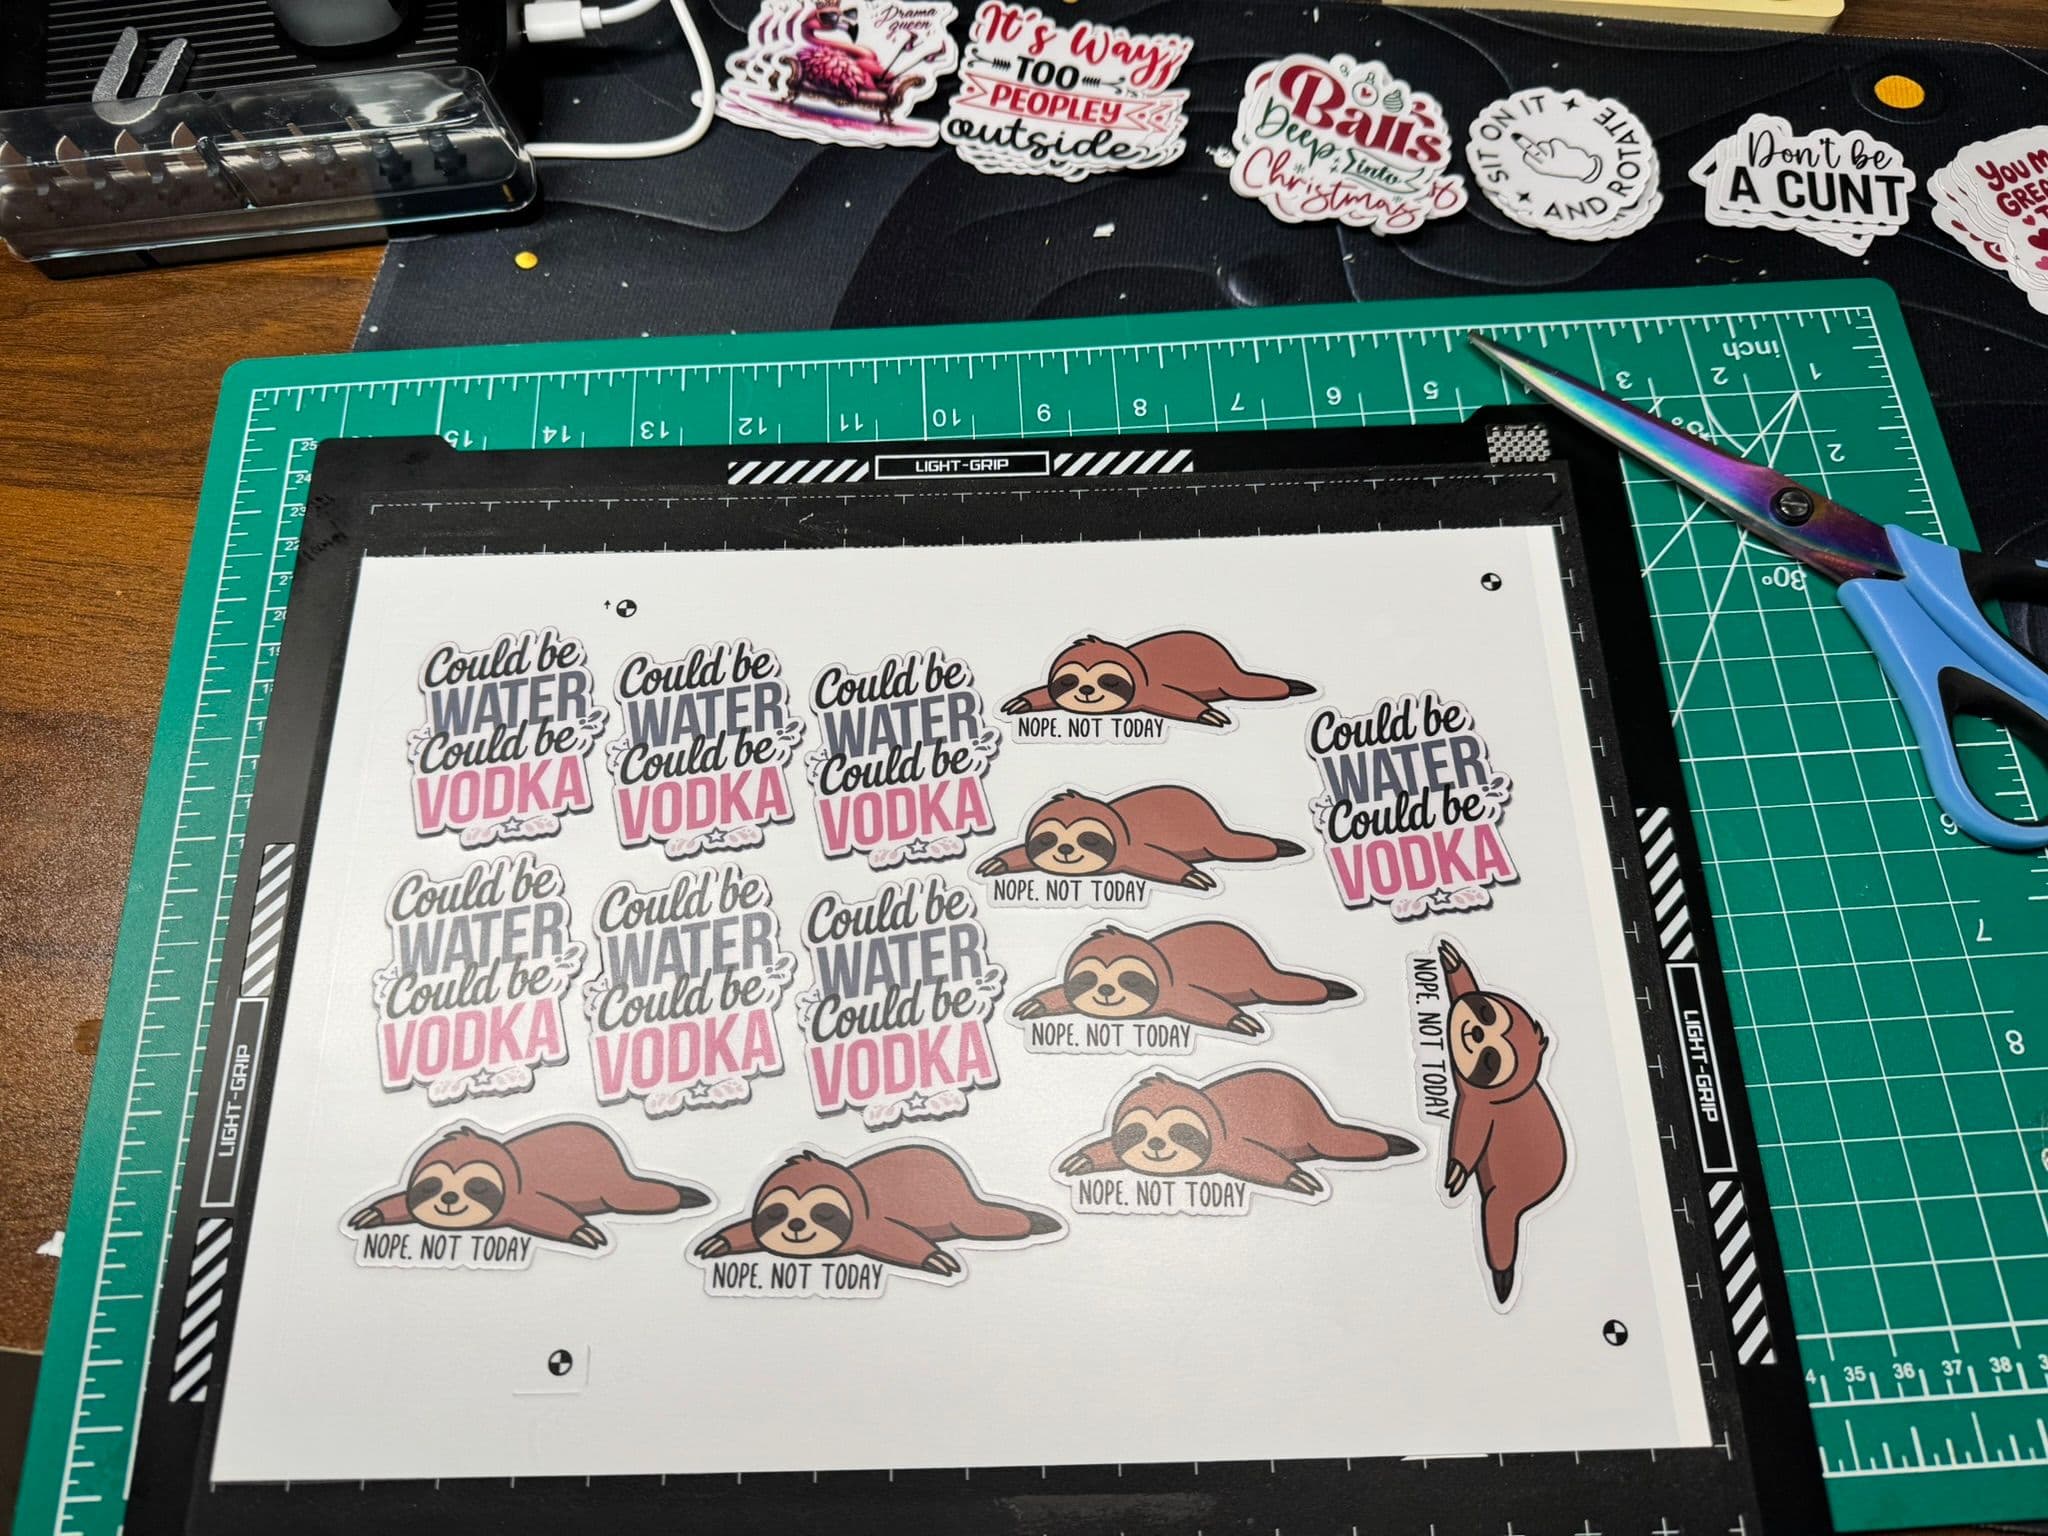
I'll be honest — I burned through way more material than I want to admit before I finally cracked this one.
If you've got a Bambu Lab H2D, H2C or A2L and you've been staring at a "Print-and-Cut calibration failure" error every single time you try to run a cut on non-Bambu sticker paper — especially if you've got a laminate overlay on top of that — this post is for you. I went down the rabbit hole so you don't have to.
Here's what I was working with:
Sounds straightforward. Run a print, apply your laminate, drop it back on the bed, hit cut. Except... every. single. time: Print-and-Cut calibration failure.
I want to share this part because I see a lot of people in forums suggesting these "fixes" and they just did not solve the problem for me — at least not reliably:
I went through all of these. Some runs would randomly succeed and make me think I'd found the fix, then fail the next three times in a row. Infuriating. It was clearly something about the laminate surface reflecting the toolhead light in a way that was throwing off the camera read every time.
After a lot of trial, error, and wasted laminated sheets, here's what actually solved it — and it took all of these changes together to get consistent results - which is really all I wanted at this point.
The issue is that the toolhead light is harsh and reflects aggressively off laminated or glossy sticker material. That glare is what's killing the camera's ability to read the registration marks accurately. The tape diffuses the light just enough to reduce that harsh reflection without blocking the camera's view.
Take a small piece of matte masking tape — I used Scotch brand specifically — and place it over the light on the toolhead. Not the camera. The light.
Keep it small and neat — you just want to soften the light output, not cover the whole toolhead. A piece roughly the size of the light itself does the job. This one worked, though I can't say it's the make or break tip. I'll update the post if things work consistently without it!
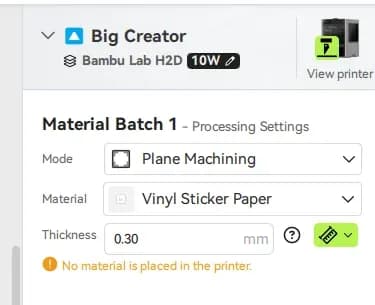
This one seemed to be the difference, at least in a few test, between a successful calibration result and a failure. The Thickness field changes by the Material set above, so if it's not accurate to the material on the plate, the pressure may not be the issue.
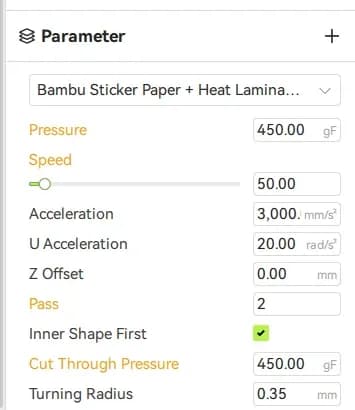
The calibration process includes a small test cut. If the blade isn't cutting through the material cleanly during that test, the calibration fails. With a laminate layer on top of your sticker paper, you've got more material to cut through than the default settings expect. It took several failures before finding a pressure that actually cut through the material on the Calibration step.
Generally, during the Print then Cut calibration step, if you watch it do the initial calibration cut and you cannot see the black material through the cut, the calibration is going to fail.
Sure, the 450gF pressure might be overkill for this thickness but it seems to work consistently and my plate isn't suffering any more than my Circut did in the past.
For good measure, I have bumped up my Passes to 2 to ensure it cuts through all layers, even the backing so I get fully cut stickers.
This does not seem to impact the calibration, or at least not directly where it does the calibration score cut a 2nd time.
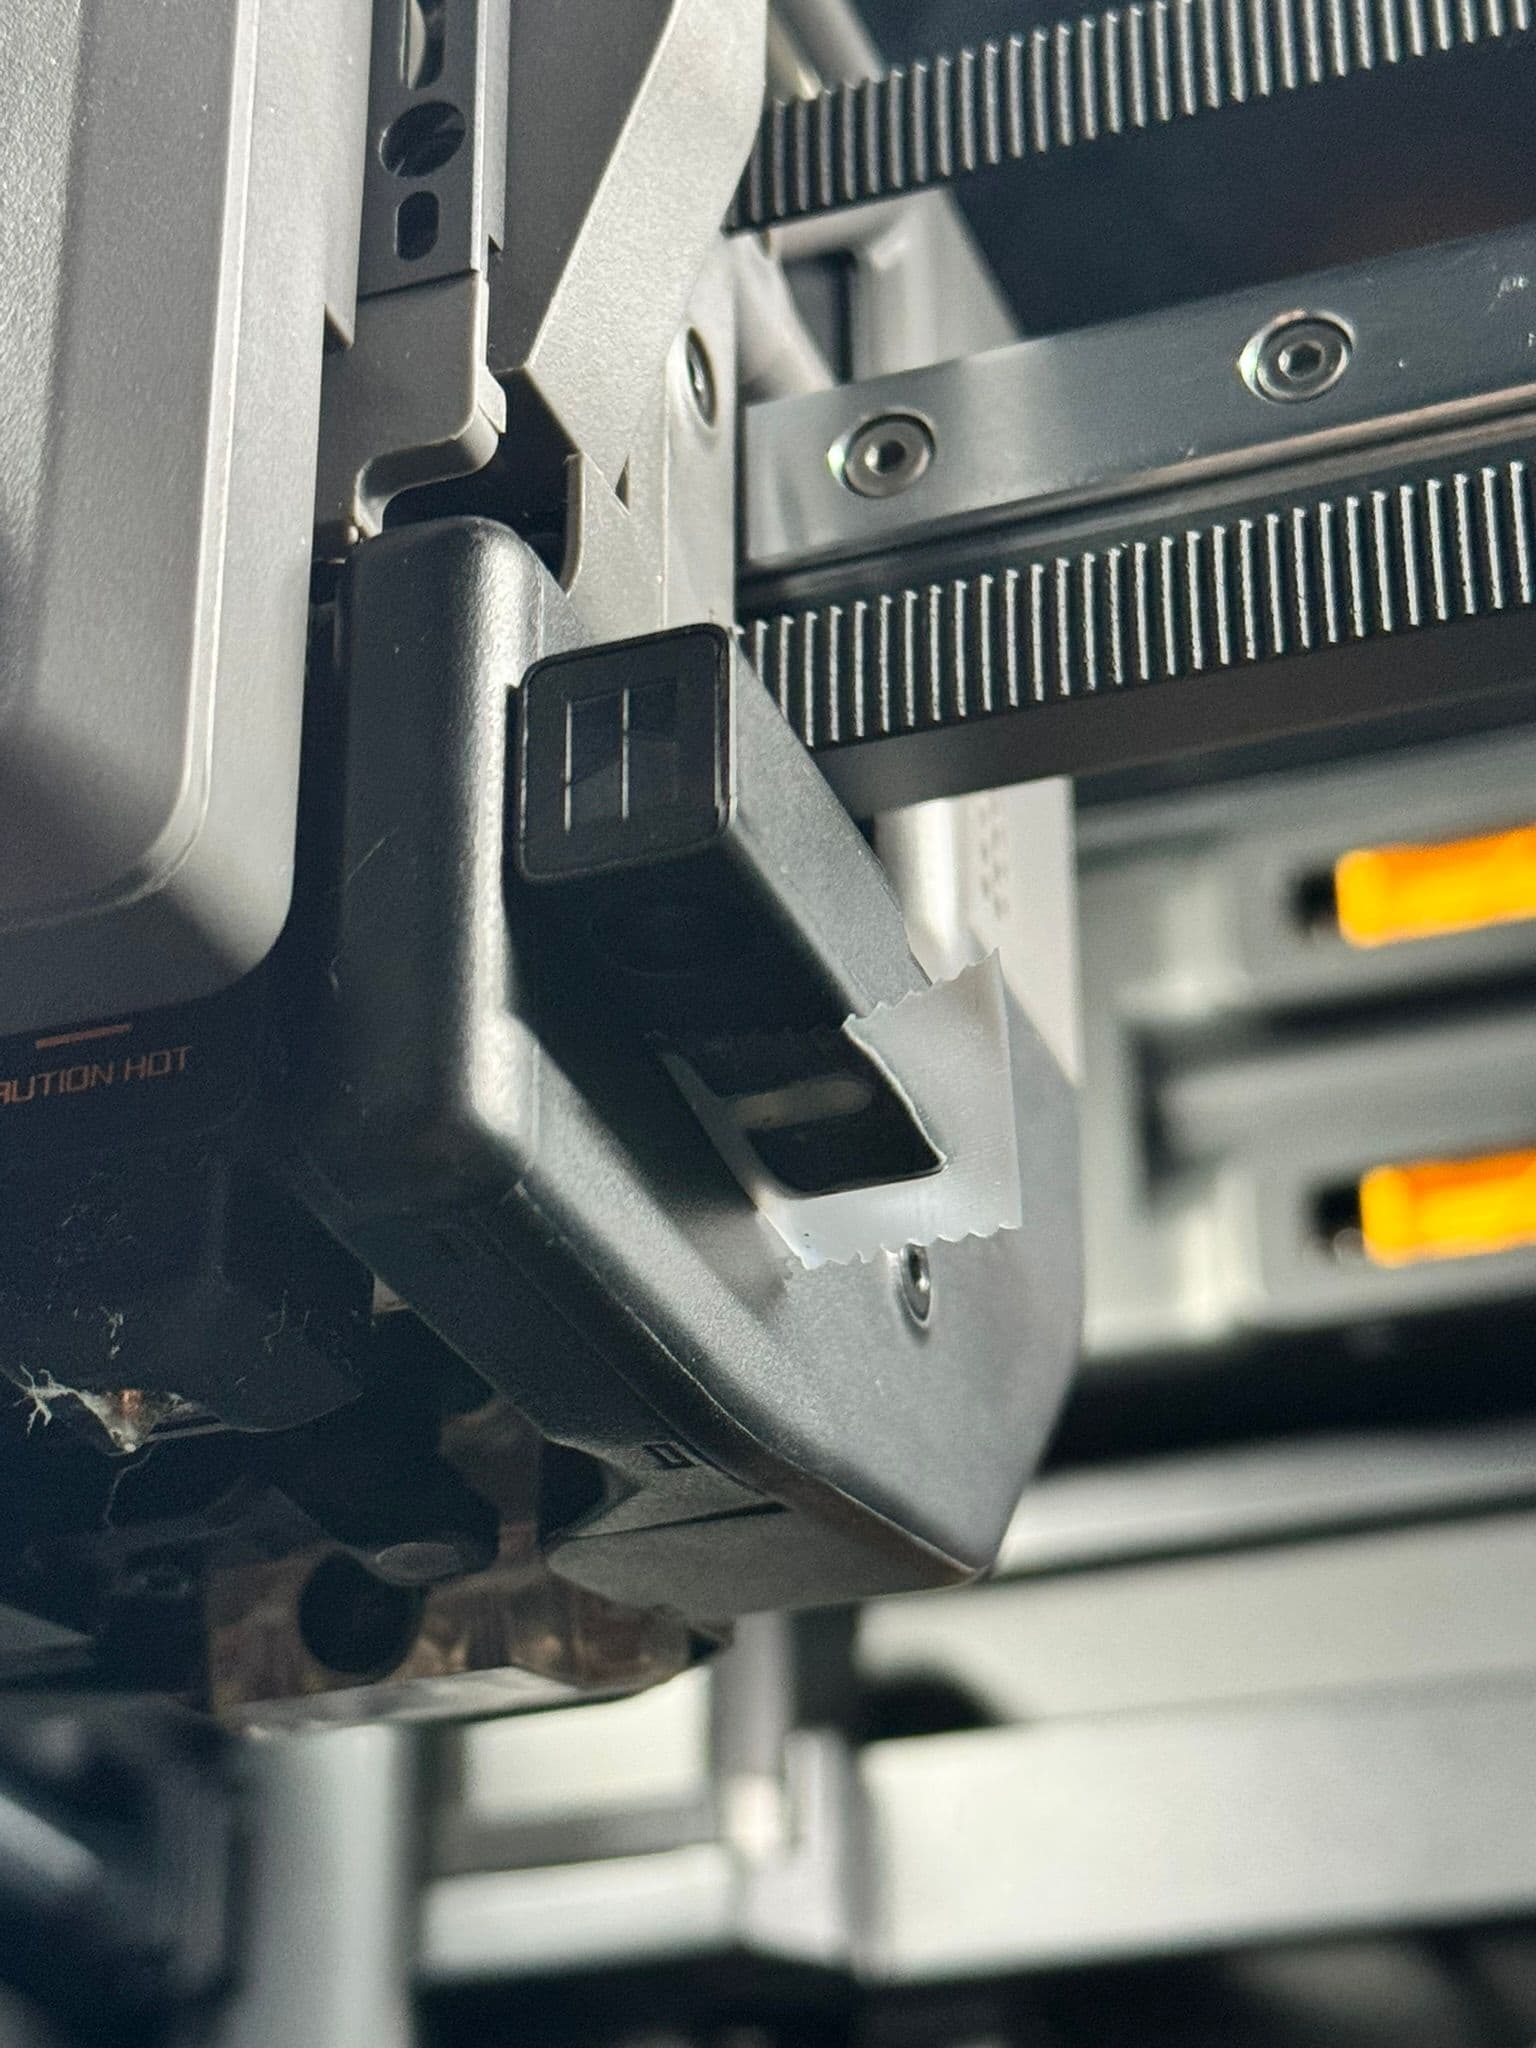
“Important: Cover the light, not the camera. The camera needs a clear line of sight. The light is the problem here.
I want to be clear: I tried each of these individually before trying them together, and the results were inconsistent both ways.
The light diffusion fix alone helped the camera read the registration marks better, but the calibration cut still wasn't going through the laminate cleanly enough — so it still failed.
The material thickness seemed to be the deciding factor in a few of the tests. While maybe this value can be slightly off and I don't know all the calculations at play, I have a hunch if this isn't close to accurate it doesn't matter now much pressure you apply, it won't cut through if it doesn't know how thick the material really is.
The pressure increase alone got the blade cutting through the material, but without the light fix the camera was still struggling to read the marks on the glossy surface and flagging calibration errors before the cut even started.
Together? Consistent successful calibrations, every time. After weeks of frustration, that felt pretty incredible; despite the wasted sheets of sticker paper and laminate.
If you've been fighting Bambu Lab Print-and-Cut calibration failures with non-Bambu sticker paper or laminated sheets, I'd genuinely love to know if this works for you too. Drop a comment below or hit me up — especially if you've got a different machine and want to share your experience.
This one took me way too long to figure out, and I'm sharing it because I couldn't find a clear, direct answer anywhere when I was searching. Hopefully this saves someone a stack of wasted laminate sheets.
Happy making. 🛠️
Tyler Cooper is the founder of _TCoops_ — a Calgary-based creative studio covering 3D printing, laser engraving, software development, and consulting. He posts about maker workflows, tools, and the messy reality of running a solo creative business.
Explore the fundamentals of 3D printing, updated for 2026. Learn about FDM printing, materials, costs, and where to find 3D models in this comprehensive beginner's guide.